> For the complete documentation index, see [llms.txt](https://fulstech.gitbook.io/docs/llms.txt). Markdown versions of documentation pages are available by appending `.md` to page URLs; this page is available as [Markdown](https://fulstech.gitbook.io/docs/custom-fields/table-custom-field-for-jira-cloud/usage.md).

# Usage

> **This app only works with Company-managed (formerly Classic) project.**

## Creating a new custom field

Please follow the instructions by Atlassian <https://support.atlassian.com/jira-cloud-administration/docs/create-a-custom-field/> to create a custom field of the type **Table Custom Field**. The following screenshots summarize key steps. There might be differences between Jira instances and Jira Cloud versions.

Navigate to the **Settings** screen.

<figure><img src="/files/7Jdb1G7AXUr5Xpab7lT5" alt=""><figcaption><p>Table Custom Field for Jira</p></figcaption></figure>

Select the **Custom fields** page.

<figure><img src="/files/rrvxkSIPBMnXiyDj1SWA" alt=""><figcaption><p>Table Custom Field for Jira</p></figcaption></figure>

Click **Create custom field.** Select the **All** menu. Search for the type **Table Custom Field.** Select and click **Next**.

<figure><img src="/files/dWTWo0qBDwSJZDrihvfg" alt=""><figcaption><p>Table Custom Field for Jira</p></figcaption></figure>

The custom field will be created.

<figure><img src="/files/XsUONRUSCVA246CQ2yxS" alt=""><figcaption><p>Table Custom Field for Jira</p></figcaption></figure>

## Configuring table columns

Please follow the instructions by Atlassian <https://support.atlassian.com/jira-cloud-administration/docs/configure-custom-field-context/> to edit a custom field's context. The following screenshots summarize key steps. There might be differences between Jira instances and Jira Cloud versions.

Click on the **1 context** link.

<figure><img src="/files/XTUiGah8lA2a8MIXPbq7" alt=""><figcaption><p>Table Custom Field for Jira</p></figcaption></figure>

Click **Create, edit or delete contexts**.

<figure><img src="/files/c8hl1QQYkxRNVHU54qH9" alt=""><figcaption><p>Table Custom Field for Jira</p></figcaption></figure>

Click on **Edit custom field config**.

<figure><img src="/files/MWXzjAw636hNlDK6OWLj" alt=""><figcaption><p>Table Custom Field for Jira</p></figcaption></figure>

Provide the configuration of columns in the table.

<figure><img src="/files/hdRzi9STy6oZkjbJuTMN" alt=""><figcaption><p>Table Custom Field for Jira</p></figcaption></figure>

## Enabling the table custom field on the issue page

Click on the **Tables** button on the toolbar.

<figure><img src="/files/R4K9zCASlLKJ2nBNlkal" alt=""><figcaption><p>Table Custom Field for Jira</p></figcaption></figure>

Click on the **Allow access** button.

<figure><img src="/files/vBIBnPcWUezOREnzKlDp" alt=""><figcaption><p>Table Custom Field for Jira</p></figcaption></figure>

Click on the **Accept** button.

<figure><img src="/files/7dyg0kKx2MotJofGeuEz" alt=""><figcaption><p>Table Custom Field for Jira</p></figcaption></figure>

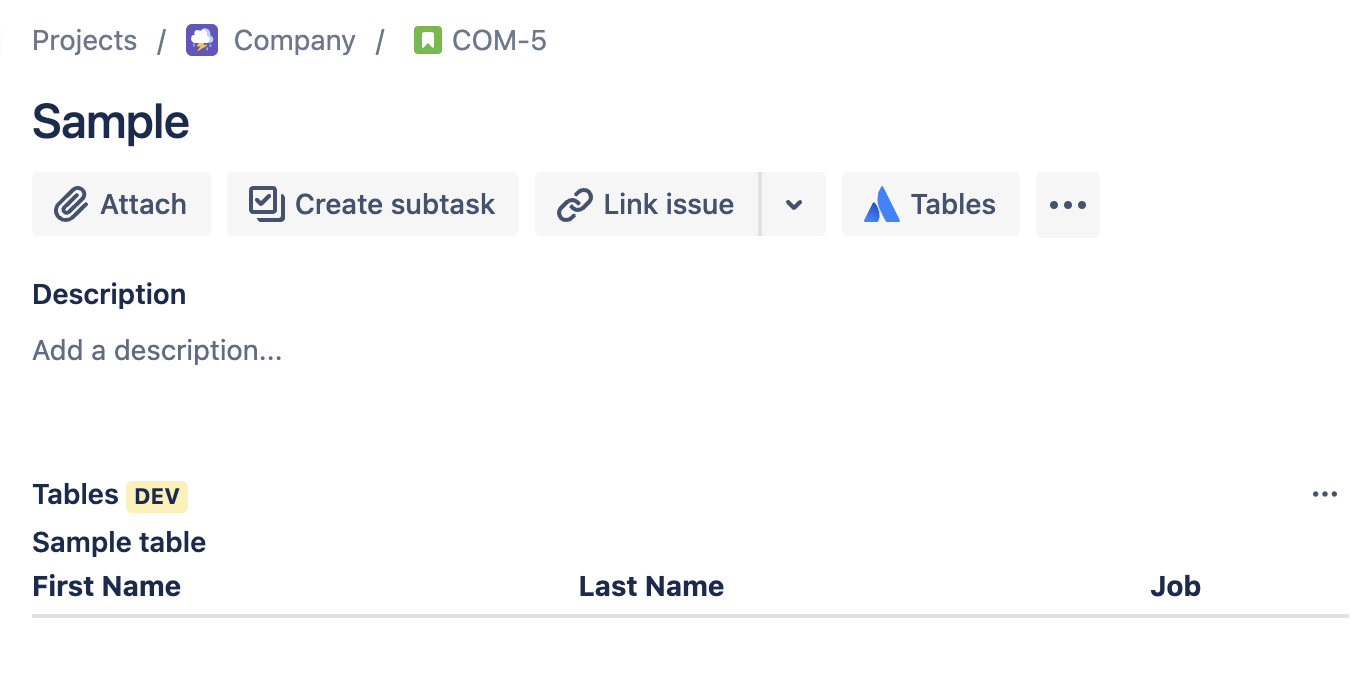
The table is shown.

<figure><img src="/files/usxoONhYRts6xD5xZI49" alt=""><figcaption><p>Table Custom Field for Jira</p></figcaption></figure>

## Working with tables

Hover on the table and click on the **Edit** button. The table will switch to the edit mode.

<figure><img src="/files/OqoKrk9WvQC9R6oIm7B8" alt=""><figcaption><p>Table Custom Field for Jira</p></figcaption></figure>

To add a row, click on the **Add** ("plus" icon) button.

<figure><img src="/files/Aw4MBi3O6UrDBUCILTcA" alt=""><figcaption><p>Table Custom Field for Jira</p></figcaption></figure>

To edit a cell, hover on it and click the **Edit** ("pencil" icon) button. Use Markdown format for the content.

<figure><img src="/files/slWnZYDdPZR1oNYL3mju" alt=""><figcaption><p>Table Custom Field for Jira</p></figcaption></figure>

To remove a row, select the row by clicking on the checkbox, and click on the **Remove** ("recycle bin icon").

<figure><img src="/files/SY1S6WiiLx3OcoNtejKk" alt=""><figcaption><p>Table Custom Field for Jira</p></figcaption></figure>

To reorder rows, drag and drop rows with the "six dots" icon.

After editing, click the **Save** button.